Quickstart Guide
In this guide, we will build a basic website featuring login with Gamma using OAuth 2.0 and the OpenID API, similar to the Gamma Demo created by Cal.
If you have not done so already, follow the guide on Creating a User Client and use
as the Redirect URI.
The Authorization Code Flow
"Logging in" to a website with Gamma is actually a form of authorization: You first authenticate your identity to Gamma by entering your credentials. Then Gamma will ask if you want to authorize the client, which will allow them to fetch information about you from the Gamma API.
This is an implemention of the OAuth 2.0 Authorization Code Flow which we will explore now. To start we will familiarize ourselves with a few OAuth 2.0 concepts:
| Term | Explanation |
|---|---|
| Authorization URI | Gamma URI where the user can log in and authorize the client. It includes the Client ID, Redirect URI and Scopes which are needed for Gamma to correctly authorize the client. |
| Client Id | Public identifier for your client. |
| Client Secret | Secret key which your client uses to authenticate itself. Anyone with the secret can impersonate your client. |
| Redirect URI | URI on your server where the user is redirected after approving or denying your client. |
| Scopes | The types of information the client wants to access about the user. Read more on the Authorization page. |
| Authorization Code | Acquired after the user approves the client on the login screen. Is sent to Gamma to be exchanged for an Access Token by your client. |
| Access Token | A secret token used by the client to authorize Gamma API requests. |
Got all that? Great! The authorization flow we will implement looks like this:
- The user presses the login button on your website. This causes the browser to
ask your backend client to authorize by redirecting to
/authorize. - Your client tells the browser to redirect to the Authorization URI containing your client details.
- The user is presented with the Gamma login and consent screens where the user can see what information your client will be able to access and may approve or deny authorizing it.
- After approving or denying your client Gamma will tell the browser to
redirect to the Redirect URI on your website. Assuming the client is
approved an Authorization Code will be included in the
codequery parameter. - Your client sends the authorization code to Gamma together with the client credentials.
- Gamma responds with an Access Token, which is used to access the API. Hooray!
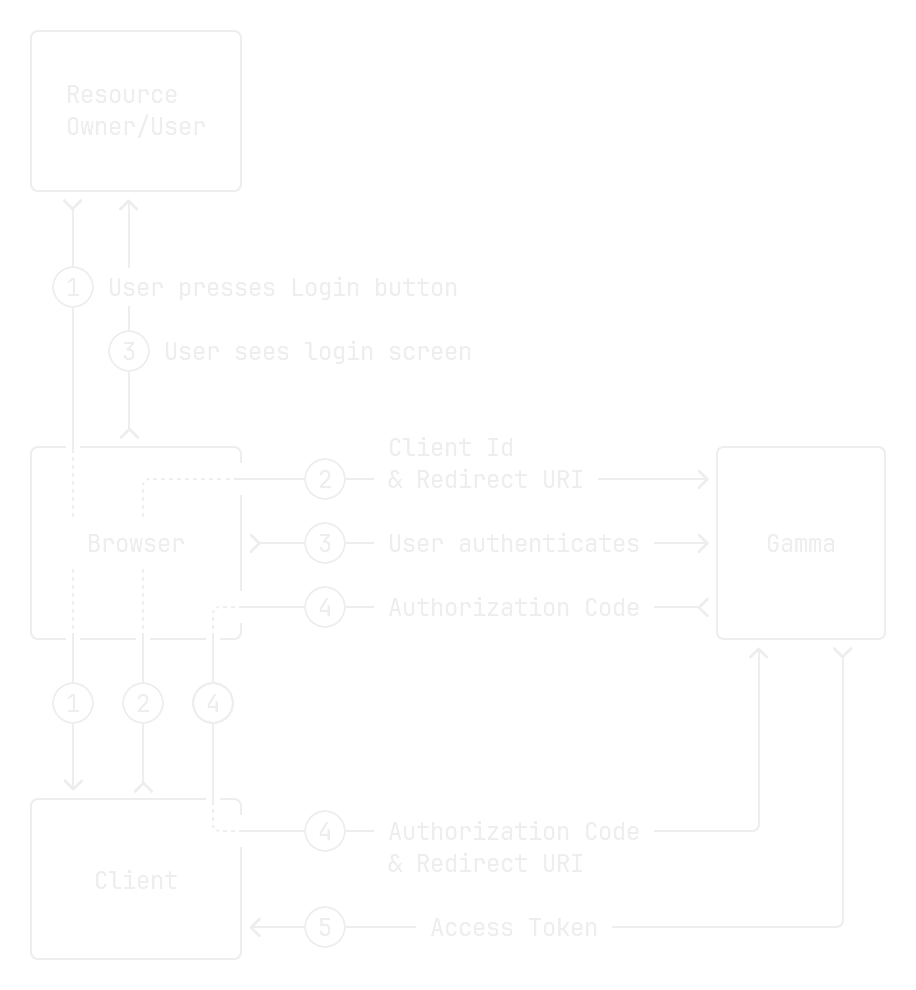

Diagram of the Authorization Code Flow in Gamma.
Read more about authorizing with the Gamma API on the dedicated Authorization page.
Follow Along
It is recommended that you practice implementing the flow yourself while following this guide. To get the starting template you can clone the Git repository at https://github.com/olillin/gamma-quickstart:
We will be building the website with Node.js® which you can get from the
official downloads page or if you are using
Nix, just run nix develop in the folder.
Then run this command in your terminal to install all dependencies:
You will also need a Gamma client, follow the instructions at
Creating a User Client and make sure the
Redirect URI is http://localhost:8000/callback and that Generate api key
is checked.
Then you can open the .env file and paste the CLIENT_ID and CLIENT_SECRET
with their respective values. The API_KEY_TOKEN is shown as "Api key" below
the client secret, the API_KEY_ID is found between pre-shared and : in the
generated Authorization header.
To start a development server run this command in your terminal:
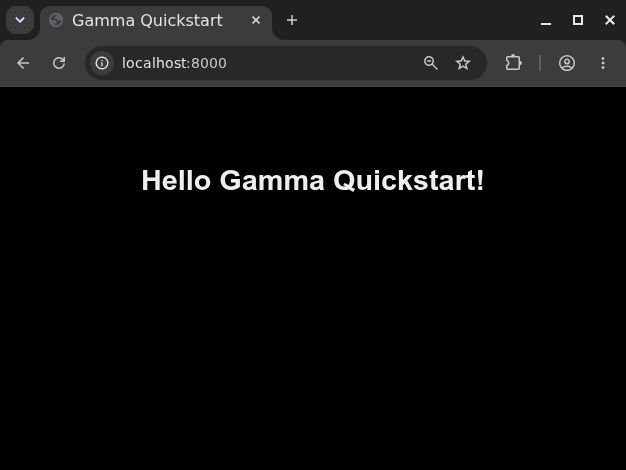
Now go to http://localhost:8000. You should see a mostly empty page with a "Hello Gamma Quickstart!" in the middle, this is the page we will be adding login to.
Tip
Keep the terminal open and the website will reload automatically when you update the source code.
Starting Point
The files included in the repository look like this:
gamma-quickstart/
├── package.json
├── package-lock.json
├── README.md
├── src
│   ├── app.ts
│   ├── home.hbs
│   ├── layouts
│   │   └── main.hbs
│   ├── public
│   │   └── styles.css
│   └── setup
│       └── index.ts
└── tsconfig.json
In an attempt to keep this guide framework-agnostic we will be using a simple
stack with TypeScript,
Express.js and Handlebars
templates (.hbs). How Express and Handlebars work together is explained below,
if you are already familiar with this you may skip to
Adding Login.
Let's look at how the homepage is rendered in app.ts:
app is the Express router which handles all requests to our website. .get()
creates a new request handler for the HTTP GET method, and there are
corresponding methods for other HTTP methods like POST or DELETE. The string
'/' is the URI path which we want to handle requests for. We then define a
handler function with two parameters: req is the incoming request and
allows us to get parameters like our future authorization code. res is the
response and has methods which define which data is sent back.
This handler is very simple and only contains a single statement renders the
template called "home", found in src/home.hbs:
Currently our template is not making use of Handlebars as it has no expressions. Let's replace "Gamma Quickstart" with an expression:
Now when home.hbs is rendered {{name}} will be replaced with the value
name in the context. The context is an object provided as another parameter
of the .render() method:
When the page is reloaded the homepage should now say "Hello Handlebars!". This is how we will display information from the server to the user of the website.
Adding Login
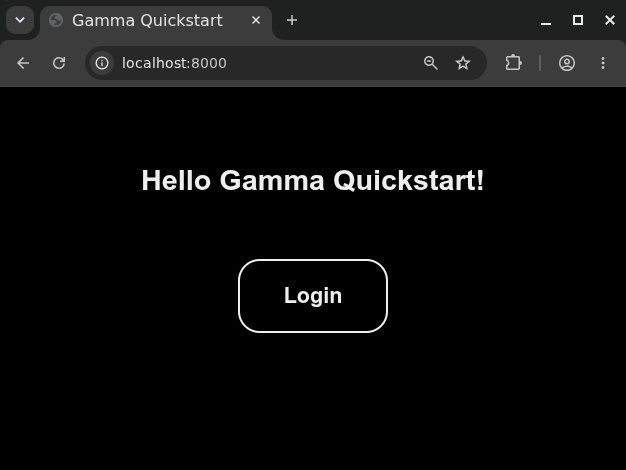
To initate the login we will create a new route at /authorize which will
create the Authorization URI and redirect the user. Edit the home in
home.hbs page and add the button:
To communicate with Gamma we will use the gammait library, a Gamma API Client for Node.js®. Code examples using openid-client are provided as a reference for implementations in other languages without a Gamma client.
First we will create a client for the Authorization Code Flow, providing our client details and credentials. We will use the methods on this client to interact with the Gamma API.
import { AuthorizationCode } from 'gammait'

const clientId = process.env.CLIENT_ID
const clientSecret = process.env.CLIENT_SECRET
const redirectUri = process.env.REDIRECT_URI

const client = new AuthorizationCode({
    clientId: clientId,
    clientSecret: clientSecret,
    redirectUri: redirectUri,
    scope: ["openid", "profile"]
})
import * as client from 'openid-client'

const server = new URL("https://auth.chalmers.it")
const clientId = process.env.CLIENT_ID
const clientSecret = process.env.CLIENT_SECRET
const redirectUri = process.env.REDIRECT_URI

const config: client.Configuration = await client.discovery(
    server,
    clientId,
    clientSecret,
)
Then we will create the route /authorize which will redirect the user to the
Authorization URI:
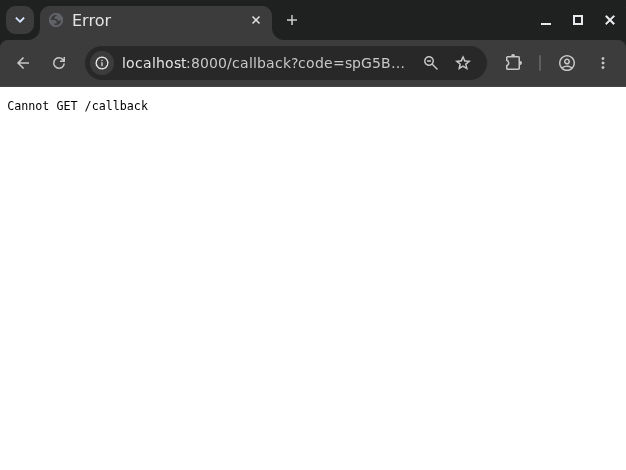
Return to the homepage and click the login button. You should be able to
authorize your client and be redirected to http://localhost:8000/callback,
although the route does not exist yet. Notice the ?code=... at the end of the
URL, this is the authorization code! The next step is to get an access token.
Creating the Callback
// TODO: Explain the process of exchanging the code for a token
app.get('/callback', async (req, res) => {
    const code = req.query['code']

    const currentUrl = new URL(req.protocol + '://' + req.get('host') + req.originalUrl)
    const tokens: client.TokenEndpointResponse = await client.authorizationCodeGrant(config, currentUrl)
    const userInfoResponse = await client.fetchProtectedResource(
            config,
            tokens.access_token,
            new URL('https://auth.chalmers.it/oauth2/userinfo'),
            'GET'
            )
    const userInfo = await userInfoResponse.json() as UserInfo

    console.log(userInfo)
})
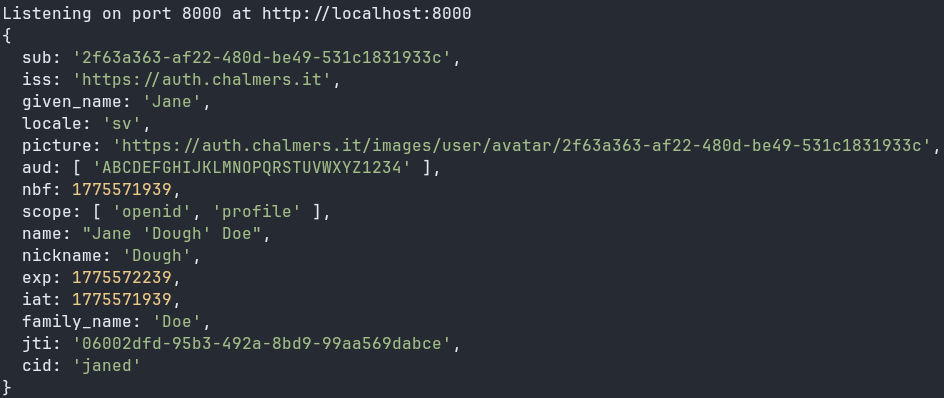
After authorizing the client you should see your user info be printed in the terminal:
Creating a Session
Getting the user info is great and all, but if you refresh the callback page you will get an error. This is because the authorization code can only be used once, so we will need to store the information if we want to access it again on other pages.
// TODO: Create session and /user page
Handling Failed Login
It is important to consider what will happen if the user does not approve your
client when logging in. In this case the user will still be redirected to the
Redirect URI but instead of code the URI will have these parameters:
| Name | Value |
|---|---|
| error | access_denied |
| error_description | OAuth2.0 Parameter: client_id |
| error_uri | https://datatracker.ietf.org/doc/html/rfc6749#section-4.1.2.1 |
We can check for error=access_denied to detect when a user denied logging in.
Alternatively, we can check for the absence of the code parameter.
// TODO Implementation
Using other APIs
Now that the user has logged in to the client we can use their id in requests to other Gamma APIs. Let's get the groups the user is part of using the Client API:
// ...

import { ClientApi } from 'gammait'

const apiKeyId = process.env.API_KEY_ID
const apiKey = process.env.API_KEY
// TODO: Remove?
const authorization = `pre-shared ${apiKeyId}:${apiKey}`

const clientApi = new ClientApi({
    // TODO: Use real syntax or update gammait
    apiKeyId: apiKeyId,
    apiKey: apiKey
})

app.get('/profile(1)', async (req, res) => {
    // ...
    const profile: UserInfo = await authorizedClient.userInfo()

    // Get the user's groups
    const userId: string = profile.sub
    const groups: GroupWithPost[] = await clientApi.getGroupsFor(userId)

    // Show the group names and post
    const prettyGroups: string[] = groups.map(group =>
        `${group.prettyName} - ${group.post.enName}`
    )

    // ...
})
- Will be visible at http://localhost:8000/profile.
// TODO
Last modified on: 2026-08-24 19:45:55